If there is ever a way to get into trouble with photography it is through sharpening. I once was a screener and came across a good number of pictures that had to be rejected in one way or another due to the effects of sharpening.
Sharpening is destructive.
Sharpening will ruin your image and in most cases you can not recover what you lost so it is important to understand how to sharpen properly and intelligently.
Sharpening should not be Global.
If you feel the need to sharpen everything in a photos then you are not thinking about what you are doing. and if you doubt me, just let me know the next time that you see a sharp cloud.
Shoot RAW
If you store your images in camera as a JPEG then you need to change this for a start. Sure it saves space and sure it saves the trouble of that RAW editing and processing stuff but it sure gives you a big problem when it comes to sharpening later on and many sharpening problems directly stem from the instant the image is captured, which as a JPEG as they can never be fixed.
JPEGs were invented for the point and shoot type cameras, basically for the type of person that puts very little thought into their photography. From the moment that you press the shutter button compromises are made a 12M Pixel RAW image image is condensed into a 5M Pixel JPEG picture and this is achieved by deleting information from the picture and that information is lost forever. A JPEG image has sharpening, contrast, saturation and brightness values assigned to it whether you want to have them or not.
Shooting RAW has a technical advantages, which I won’t go into here but the other main advantage is it is as it says on the tin, a raw image, nothing has been done to it, leaving you the photographer with total creative control over how the whole image is processed.
RAW is far superior and a lot more forgiving of mistakes.
Before I go on, it is worth explaining that most cameras have what they call an anti-aliasing filter fitted to the sensor, again I won’t go into the techno-babble except to say that this filter deliberately and subtly blurs the picture, so every picture that is taken needs some form of sharpening. So you should have a stage in your RAW conversion workflow to apply some form of sharpening to compensate for this anti-aliasing filter before exporting into Photoshop for the final editing.
To put things in perspective, my own camera produces an 18 M pixel image, that is 5,100x 3,100 pixels on the screen, so we are not talking about sharpening as you would go for presentation for the web or print, all we are doing is giving it a little help, which goes a long way at the final stage of your workflow when you sharpen for output.
The confusing thing is people say that sharpening should only be done at the final stage of your workflow, this is partly true for no other reason than sharpening is destructive but we are not sharpening for the final image but just enough to subtly counter the anti-aliasing filter and no more
The de facto standard in RAW photography conversion editing is Adobe, whether it is through Lightroom (LR) or Adobe camera RAW (ACR), the actions are one and the same, just presented in a slightly different way but all the controls in LR are there in ACR.
Sharpening can be subtly applied and they are both have the same steps. Me, I use LR as a RAW conversion tool and occasionally Canon’s Digital Photo Professional, DPP to get the job done. Before I go on, a friend reminded me of a crude, although appropriate phrase that sums photography up in general and that is, “you can’t polish a turd.” Basically if the image that you start with is rubbish then no amount of polishing will make it into a great image.
You have to be honest and as self critical of your photography as you can, a dodgy image is not worth the time spent on it nor the screeners time, should you wish to send it to a photo database.
Sharpening in Lightroom

Lightroom Detail panel
I tend to use the default Sharpening Amount, which should be around 25, just enough to counter the effects of the anti-aliasing filter. The more effective slider is the Masking, this is an edge-sharpening type tool, effectively you can adjust it until all the variations in the sky are eliminated and all you have left is the edges, which are the things you want to sharpen, masking off the sky so you don’t generate any unnecessary noise.
The Noise Reduction Luminance slider is set to a small amount, generally my files don’t contain any appreciable amounts of noise but it’s good to apply just a very small amount to be on the safe side.
In my case, the bulk of the sharpening takes place in Photoshop CC.
Because I use LR, all the editing functions like colour, exposure and crop have been done, so all I have to do now is export to Photoshop and remove distracting objects, resize, sharpen and save. I will now jump forward to the sharpen phase.

The finished article
Before we go on, lets have a look at the picture. I used f/8, which gives a narrow enough depth of field at this range and because I panned the shot, this means that only the aircraft is in focus and everything else is blurred. So why on earth would you want to apply sharpening to the whole picture and why try to sharpen the parts of the picture that are out of focus or blurred?
Sounds daft when you think about it but countless photographers do it.
If you had wanted the background in focus then you would need to select a narrow aperture for a large depth of field and not rely on sharpening to do the job for you.
The major drawback with Photoshops’ Unsharp Mask (USM) is that it really does try to sharpen everything and that includes the sky, my picture is fairly uniform but it has subtle variations in sky tones, which USM will detect and try to sharpen leaving noise and colour banding in its wake.
So the clever thing to do is only sharpen the parts of the picture that need sharpening and leave everything else alone.
Smart Objects.
Smart Objects are perhaps one of the least understood items in Photoshop and yet they give the precious gift of being able to go back and adjust the Smart Object in a non-destructive manner and sharpening, especially USM sharpening is destructive. Once USM is applied you can not go back an tweak it, you can go back in History and begin all over again but that’s not very productive.
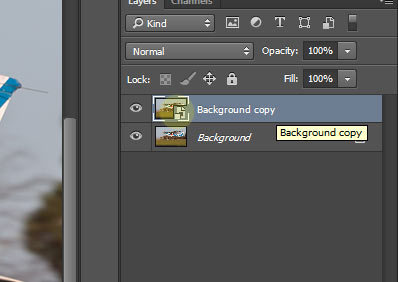
The first thing that we need to do is create a new layer, this is so we only work on a copy of the original layer, so if things were to go pear-shaped and we make a total mess of the Smart Object then all we need to do is delete the copied layer, make a new one and start all over again.
There is nothing to be afraid about using Layers, think on them as panes of glass placed on top of your original so you can copy and edit the panes without affecting the layers underneath.
The easiest way to do this is using the keyboard short cut Ctrl+J. The other way to do this is to left click on the original layer and drag it down to the New layer icon shown in yellow, release the mouse key and the new layer is created.

Create a new layer
Next we need to create our Smart Object and there are two ways of doing this. You can either go to IMAGE, SMART OBJECTS, CREATE SMART OBJECT

Layer Smart Objects
Or…
I don’t know what the fancy name for this icon is called but select the icon on the layer palate and then Convert to a Smart Object. This is by far the easiest way to do it.

Convert to a Smart Object
The thumbnail on the copied layer will change to include a little icon in its bottom right hand corner
Smart Object icon
Now we need to get cleaver with the sharpening. USM is destructive, because it is global, it sharpens everything, which is not cleaver. What we need is a sharpening technique that only sharpens the edges and leaves everything else alone and this is where High Pass Filtering comes in.
First of all we need to set out Layer Blend Mode to Luminosity. This will ensure that we sharpen the brightness and not the colour values of our picture. Confused, well don’t be, just trust me on this one.
From the drop down box above the layer tab, where it says Normal, select the downward arrow and select Luminosity.

Luminosity Blend Mode
To create the High pass filter, go to FILTER, OTHER, HIGH PASS…

High Pass Filter
Now things will get a bit whacky, don’t panic. You need to select a Radius value for the Filter, from experience 0.3 pixels is about the bare minimum, 0.5 is a not bad starting point and 0.7 is on the high end. You can go further if you want but generally 0.5 is a good place to start. We can change this later if need be.

Selecting a radius value
We now need to change the blend mode of the High Pass Filter layer within the Smart Object. We do this by clicking on the double headed arrow icon to the right of the High Pass layer within the smart Object, then click on Mode and change it from Normal to Overlay. Any of the other blend modes between Overlay to Hard Mix will work and produce varying effects. It’s worth experimenting with the other blend modes but Overlay will do for now.

Selecting Overlay blend mode
Things will go back to normal and what you will see is your sharpened layer. You can test this by clicking on the eye icon on your Smart Layer. Toggling this on and off with show the unsharpened layer underneath and the sharpened layer on top. When finished, leave the eye icon visible.
Now we start to get smart, we can now go back into the High Pass Filter layer and change the amount of sharpening if we wish. To do this click on the High Pass layer in the Smart layer.

Selecting the High Pass filter
A dialogue box will open and you can increase or decrease the Radius to change the sharpening. When finished select OK to close the dialogue box.
Now we can get smarter by choosing where and how much we want to apply the sharpening.
I have cooked the image for effect by cranking the radius up to 2.5, using the method described above. You will see what a mess I have created with halos around the registration, wing top and tyres. I am now going to mask out the problem areas by totally removing the sharpening from them. This is termed Selective Sharpening and is well worth knowing how to do it.

Problem areas
We now need to select our Brush Tool, the keyboard shortcut is B, or you can select it from the Tools Palate. I park mine on the left had side, yours may be somewhere else. (Using keyboard short cuts means you don’t really need this palate and can greatly speed up your workflow.)
We now need to set our foreground and background colours to their default values of black and white. You can select this by the keyboard short cut D and toggle between black and white by pressing the letter X on the keyboard.

Brush and Foreground/Background colours
NOTE at this moment I have selected yellow as my foreground colour, it should be like this…. Mine may be visible as yellow, it needs to be black or white for the masking to work properly.

Foreground is black…
We now need to select the layer mask within the Smart layer. If you click inside the white rectangle, where it says Smart Filters, you will see four corner brackets appearing. This means that this layer has been selected, which is what we want.

Selecting the layer
What we are going to do now is hide the sharpened bits of the aircraft totally removing the sharpening from those areas. We do this by masking and it is worth remembering this Black conceals and White reveals. So we want to paint some black into this Smart Filter Layer to remove the sharpening. Going back a little we have already selected black as our foreground colour.
One last thing we need to set our Opacity of our paint brushes to 100%, here I have mine at 53%, either drag the slider up to 100% or press the number 0 on your keyboard for 100%

100% opacity is needed
You will need to select a suitable brush size, it is easiest done by the keyboard shortcut [ to decrease and ] to increase the brush size. Now paint on your picture on all those problem areas. I selected a very large brush size for effect but you should see small patches of black appearing in the white layer mask and more importantly the over sharpening disappearing.

Masking out the over sharpened bits
Now we want to paint back the sharpening but ar an amount that you want not Photoshop, you can do this by changing the foreground to white, remember X toggles between foreground and background and you should see a white square uppermost. With a white foreground selected then select an opacity value for your brush. I tend to start with 20%, you can either do this by pressing 2 on the keyboard of set the Opacity slider to a suitable value.
When you are happy with the sharpening we will flatten and save but before then…

Afore ye go…
I left the halo on the trailing edge of the aileron alone, that too would have been corrected but ultimately, I would have went back into the High Pass Filter layer below…
Selecting the High Pass filter
… and reduced the radius to a sensible value leaving me with a lot less masking/selective sharpening to do.
There is also a strange hard line in the exhaust haze, maybe one of the more “anal” picture screeners may take exception to this and reject it, I could soften the line down with the Clone tool or remove it with the Patch Tool but I know it’s OK and i don’t have anal screeners to contend with so I am going to leave it alone.
So finally, we need to save the image. We could save it as a PSD file, which is the native Photoshop format, this would preserve all the layers intact but takes more disc space, so I tend to save the image as a JPEG and to to that you need to flatten the layers first. NOTE – there is no going back after it is flattened and saved. I still have the original RAW file to go back to should I need to re-edit, it’s a compromise that I have made.
So LAYER, FLATTEN IMAGE

Flatten Image
or from the layer palate, click on the icon to the right of the layer palate and select Flatten Image…

Flatten Image
… and finally SAVE.
This may seem like a lot of effort but it is worth it in the end. The job is made easier with Photoshop Actions. Each and every step is recorded and saved and all you have to so is select the Action and run it, saving you a lot of time and effort. However how to make Actions is out of the scope of this tutorial and can easily be found on YouTube etc.
But there’s one thing for sure…..
